UPDATE 8
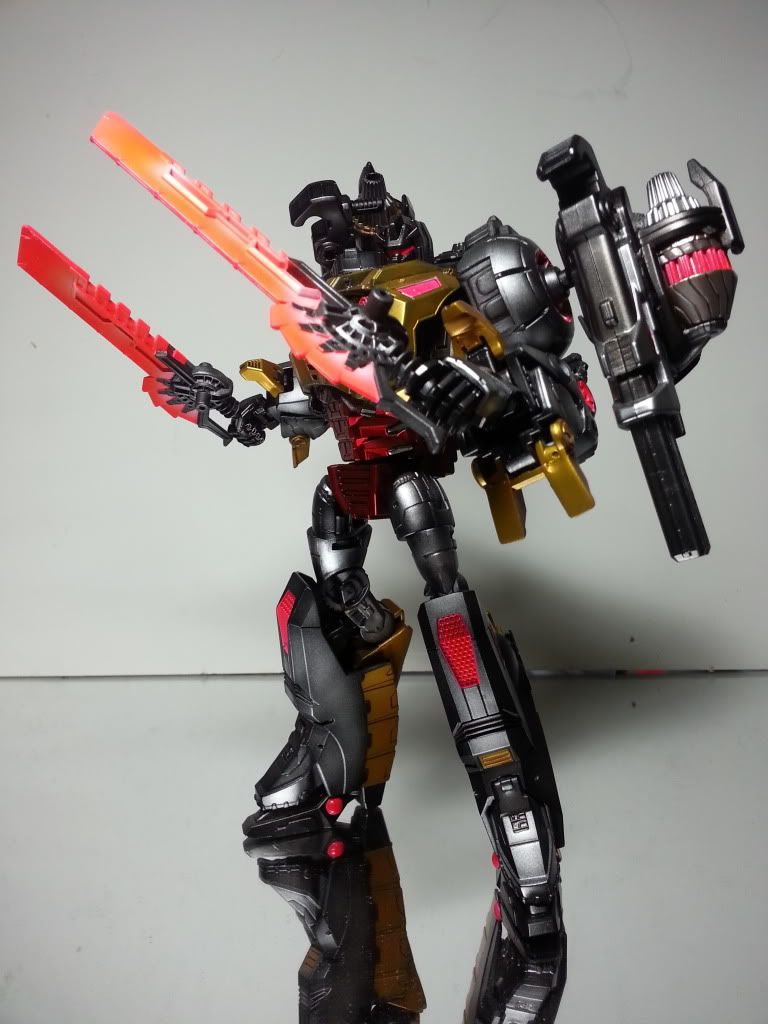
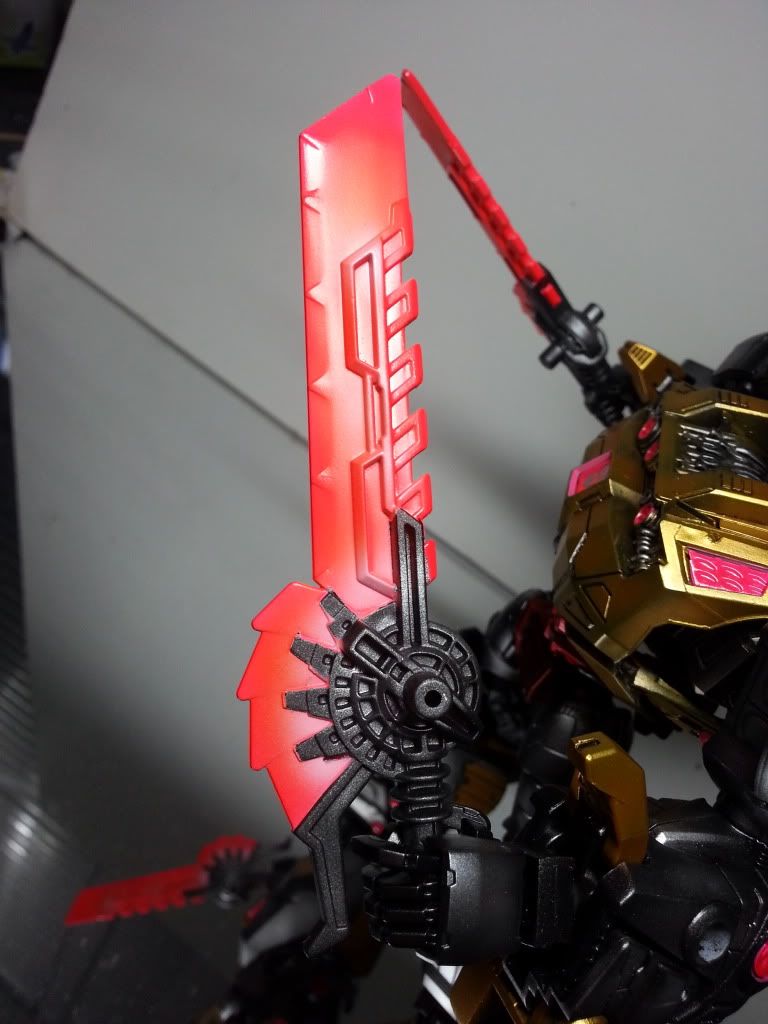
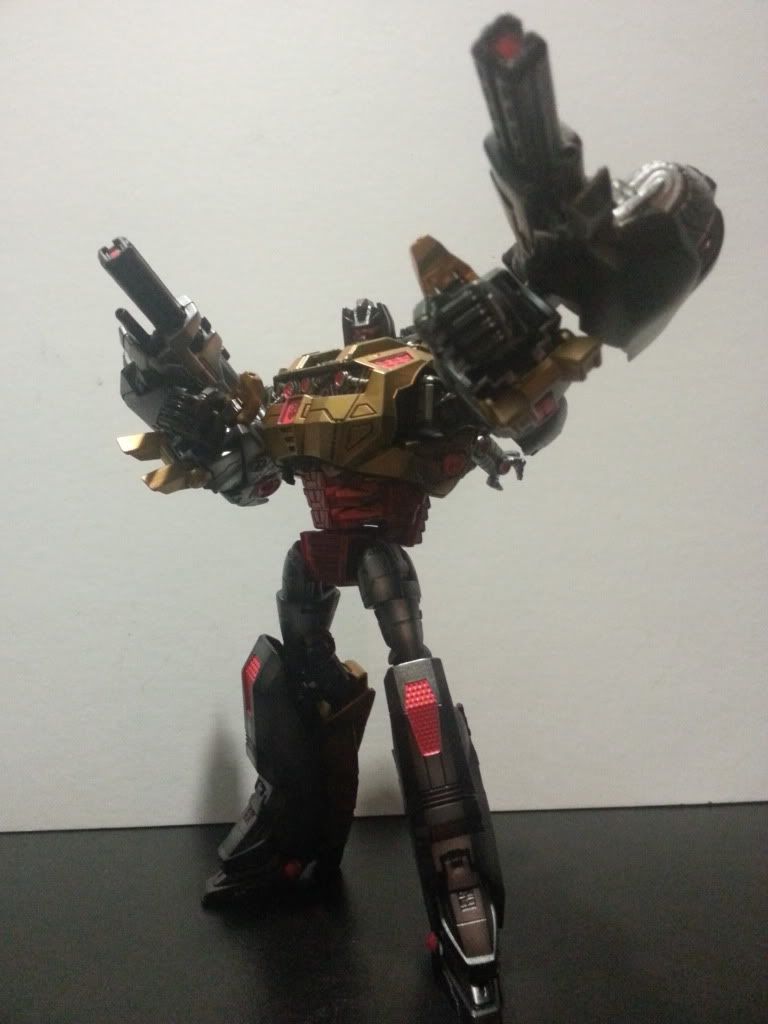
Whew finished the remaining armaments! Two Schneider energy blades. I actually prefer these to the War Axe and Shamsher Shield. They kinda have a more raw, primal quality to them that encapsulates Grimlock's persona. As usual, glow effects achieved using Gaia Notes Fluoro Red, a touch of orange yellow and some white misting. Gonna go down to Hobbymate's to shoot some UV shots when I have the time on Mon and do a proper photo set. Meanwhile, this baby's heading down with me tomo in a display case to China Square Central! Do drop by to say hi.
UPDATE 7
Alright here we go! Managed to finished two more weapons - a War Axe and Smasher Shield (which is basically just a bask of two original puny shields LOL). The axe is a third-party TF accessory that I repainted. These are just test shots and not a proper photo set, but I whipped out my mirror base and proper backing for some sleeker pics. I'm left with two short swords that I'm too lazy to paint for now so as soon as I get 'em done, we'll have the final reveal and photo set. Stay tuned!
UPDATE 6
Added two arm cannons, his first weapons with more to come. What am I'm going for? FULL WEAPONS SYSTEM GRIMLOCK! lol. Two guns aren't enough. We need more. I doubt I can complete everything over this weekend as I'm tied down with other commitments but we'll see. We'll see.....
UPDATE 5
Didn't get down to doing much today cos there was just too much stuff going on LOL. Yes I have a life too, outside of this! All I managed was this comparison snap with an extra set of Grimlock. Apart from the difference in height, there are also subtle extras such as a more articulated power pose as compared to the ramrod-straight posture of the original LOL. I'm excited about those fluoro glow bits. Gonna bring it down to a friend's shop this weekend and snap some UV shots cos this paint glows under UV light. Sexaaay or whad huh? Aight, hopefully I can finish the touch-ups tomo and arm him with some kickass weapons within the next coupla days. Stay tuned...
UPDATE 4
I can almost see the finish line now...well at least for the main Grimlock figure, sans weapons like his giant battle axe and twin cannons. We'll get to that later. First up, really pleased with this metal decal on fluoro red effect. Got my TF metal decals from Samuel Decals. Easy to apply, high quality stuff.
Back to masking hell!
Masking is always a drag, but if you do it right, it's like unwrapping a Christmas present with each piece after the painting's done eh? LOL
Dirty silver. There is something gritty and rugged about Grimlock so I can't have him look too bling despite using metallics. Anyway, the rough cast-iron texture of the original plastic helps rough it up a lil.
UPDATE 3
First up, just made some major mods on a really cool toy gun from a Fall of Cybertron Sideswipe (he's an Autobot colleague of Grimlock's), which can be installed onto Grimlock too. Hasbro's TF guns are usually an ugly afterthought but I must give credit to this one. It's really pretty well done with a retractable rail barrel, turbine unit and all. Of course, I had to get TWO Sideswipes to own two of his guns. Another problem was that the gun is made to fit the right hand, which means if I wanted to equip the left with one, I needed a mirror image of the gun for symmetary. Not sure if u guys know what I'm talking about I'll post WIPs of the gun mods later. Right now let's just enjoy Grimlock with his guns mounted.....
They can be mounted on his shoulders like binder armour to give him a really heavy-set look. Kidna reminds me of the Double 0 lol.
If not just plug 'em in to sockets on his fore-arms for some shooting action:
Retractable barrels also let's you lengthen the guns. Fab weapon!
UPDATE 2
'Back with another update on the Grimlock WIP. I tightened some joints in the torso for a straighter posture and re-designed the back. Filled up those dreaded hollows with epoxy to make parts look more solid and realistic. Here we go ---
Evolution of the claws, which are the most dreadfully hollow lol. Left to right - original to epoxy stuffed and then sanded down. Epoxy is fun to mould and play around with but the real work comes when it has hardened and you start sanding. MAN, it's a lotta effort and poisonous epoxy dust that you gotta steer clear of breathing! I actually am not too enthusiastic about using epoxy...will try NOT to use it if I can. It's just messy man...
Next I dug out a spare Destiny MG feet. Okay it wasn't a spare. It was from a finished kit I did waaaay back, which had no standard and so I thought, why not recycle, right? LOL. Cut out the calve joints and cemented them into Grimlock's hollow legs.
More dreaded epoxy to fill out the enormous tail cavity....Yikes:
It's true, when you prime something it just looks that much better cos the mono-tone grey just brings out all the details LOL. Couldn't resist putting him together just for a comparison with the original toy.

UPDATE 1
So here we go, I'm back blogging again with my current project, a custom Fall of Cybertron series Grimlock. In my experience with customising Transformers, I've usually met with mixed reactions from people. Not that I've customised a lot of Transformers, of course. The only major one I ever did was Killa Bee. That didn't really cause so much as a ripple in either the Gunpla or TF community LOL. I think I know the problem - TF fans want to see a Transformer that can TRANSFORM, whichever way you customise it. It can be drop-dead gorgeous, but if it can't transform, it ain't a Transformer. That's their mantra. Gunpla fans, they just don't like the look of a Transformer whichever way you customise it....Unless it starts looking like well, a Gundam LOL. So is it an exercise in futility, embarking on this Grimlock assignment? Two words: Who. Cares. LOL.
That's right - I don't really give a shit. If it suits my sense of aesthetics, I'm happy. I've always had a gripe with TF toys even though I consider myself a faithful TF fan - TF toys focus so much on the transformation that they don't pay much attention to the robot form, which is where my Gundam eye comes in. So it's my own perverse wish to see a proper-looking, Gundam-proportioned TF. Never mind if he can't transform after the mods. I just wanted an "MG Grimlock" if ya know what I mean LOL...Now that you've heard my point of view, let's get crackin' -
Who is FOC Grimlock?
He's the coolest ever rendition of Grimlock, on-screen and as a toy I've seen. Based on the video game's Fall of Cybertron character, this Grimlock is as I've always imagined him to be. Of course, understandably with all TF toys, Hasbro designed him in a way that has to allow for transformation into T-Rex mode. Hence posability and articulation in robot mode has to be compromised for a dino parts and form - there is no hip or torso articulation, no ankle joints and tons of hollow cavities. Still, Hasbro did a good job on this one. It was precisely cos the toy already looked pretty good by itself, which caused me to wanna give it a few mods to make it even better!
Next, we break up the most important part, which is the show-piece for the entire mech - the torso armour. To create articulation. I sacrificed some spare gunpla bits to create the joints and fulcrum:
Grimlock's new "organs". LOL
When you put all three torso parts back together, the joints work to allow a front to back swivel of the body, and right to left swing of the hips, which makes it way sexier to pose!
Next is the head. The original just looks one way, and turns left to right. I want him to be able to cock his head for that "watcha-lookin'-at" stare with an attitude, so I extended the neck joint with a bit more pla-bit:
Now we're getting somewhere with a bit of a slant here, a little angle there...sexy.
Following that is another important part - HANDS. Gunpla parts to the rescue again. If you've got TF toys you'll be familiar with a notorious feature they come with - masturbation hands. Yep. Little knobs at the end of fore-arms with holes in them to plug your weapon that they call "hands". Looks like they are perpetually clutching a cylindrical object. You see what I'm gettin' at here. So removed they must be. And replaced with Gunpla option part manipulators.
Next I wanted to fill up the glaring hollows on the insides of his shoulder armours. Yikes -
Filled it up with koto bits and pla-plates. It's harder than it looks because there is a swivel joint that I have to accomodate, so I can't just fill up the entire cavity:
And that's all we have for now, as I take a break to put my crudely modded Grimlock together to compare with a spare out-of-box piece. I've added Gundam feet to the end of his legs to give him added height and ankle joints. More updates to come!:


15 comments:
HELLA COOL BRO!.
Thanks :)
Look good and taller.
Please3 give him a crown.
damn! you're poisoning the minds of gunpla noobs like me with your awesome GRIMLOCK
Great job. I already liked Grimlock a lot. Your redesigned version is fantastic.
Looking fantastic! How do you mask the circular/round parts?!
Thanks bro :) Round parts are masked just as you would mask any part - tape after tape after tape to form the circle shape. It's tedious, but it pays off. ;D
Outstanding! The height and dirty silver really brings out the Grimlock personality. What sort of Silver did you use on this?
Gaia EX silver on a gloss black base
Hi Waylander, I'm new to customizing and I would love to start with the FOC Grimlock but I have a few questions. Where can I learn more about gunpla, koto and pla-plates parts, etc.? I have no idea what they are.
Hi @Vikrim, there is no one site to start with gunpla. You just have to surf around and check out all the modeller's blogs and sites like I did. Another way is to do a search on Youtube for live demos. I would recommend you check out Toymaker's blog. He's a good friend of mine and taught me most of what I know. :) If you stay in Singapore. go to Hobby Art Gallery, a gunpla shop at Sunshine Plaza on Bencoolen street. That's where I hang, and the folks can tell you ALLLLLLL about the gunpla universe. Gd luck!
@Diablo Roberto, sorry bro, but I don't think I took any pics of how I did the gun...Too engrossed doing it to slow down and take pics :P All I can say is I did lotsa cutting and sanding down, and then duplication with pla-plates and more sanding down again to get the rough mirror-image shape of the gun from the other side.
Dude. Props to you bro. Amazing talent.
Post a Comment